
How to get an instant quote.
Upload your drawing, choose your material and see your price in seconds. Here’s how it works, step by step, with tips for getting perfect parts from your files.
Five rules for a perfect file.
Most quoting problems come from the drawing, not the part. Follow these and your file will price first time.
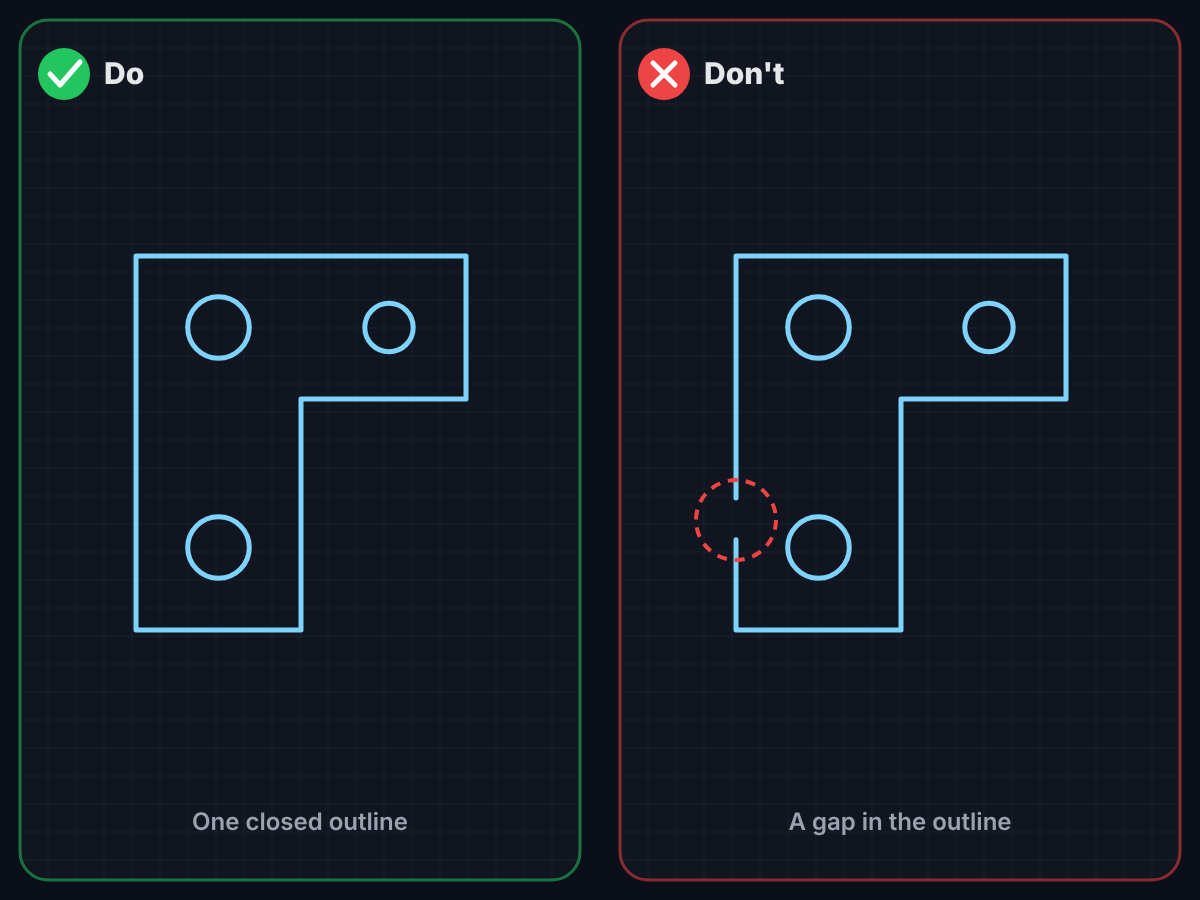
Draw every shape as one closed outline
The laser follows your outline from start to finish, so every shape needs to be completely closed. If two lines don’t quite meet, even by a fraction of a millimetre, there’s no shape to cut and the quote tool will ask you to fix it. Small gaps are fixed automatically but please check your drawing first.
- Zoom in on every corner and check the lines join
- Use your CAD software’s join or close command to fix gaps
- Holes and cut-outs need closed outlines too
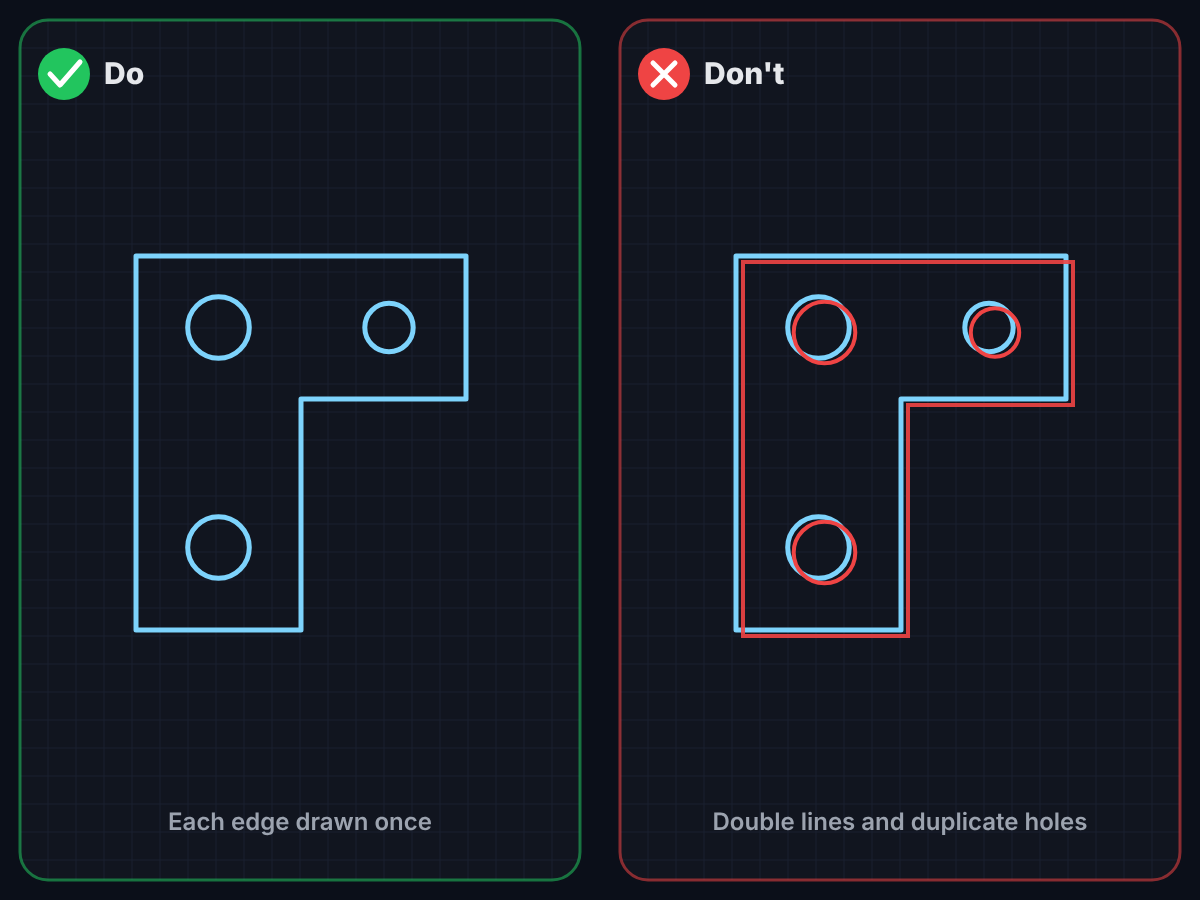
Draw each edge only once
Lines drawn on top of each other look fine on screen, but the laser cuts every one of them. Double lines and duplicate holes cause burn marks, slower cutting and extra cost, and can stop your file being quoted.
- Delete any doubled-up lines and holes
- Most CAD software has a “remove duplicates” or “overkill” command
- Watch out for copied-and-pasted shapes sitting on top of each other
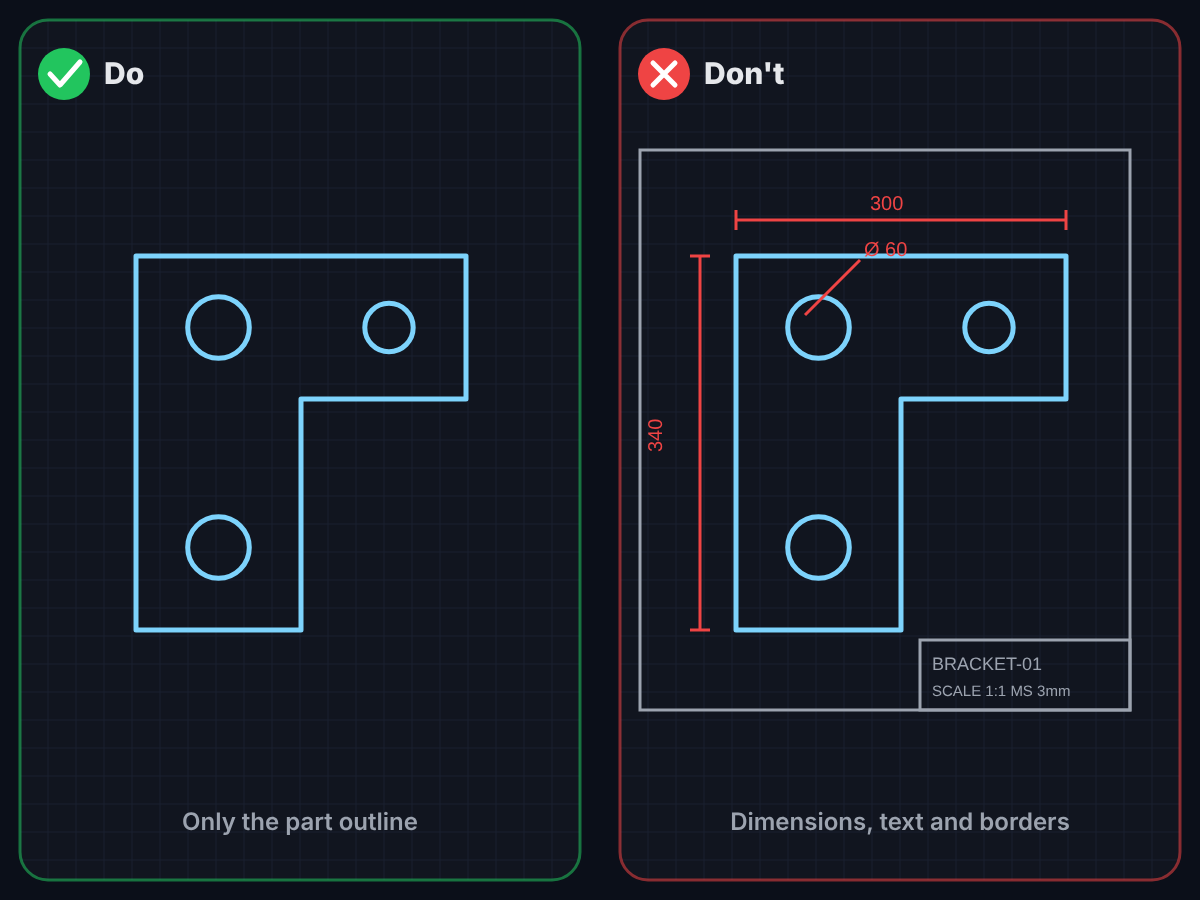
Send the part, not the drawing sheet
Dimensions, notes, borders and title blocks are all made of lines, so they’d be read as things to cut. Your file should contain only the shape you want cut.
- Delete dimensions, text, arrows and centre lines
- Remove borders and title blocks
- Remove bend lines on flat parts
- Tip: keep your full drawing, and save a cut-only copy to upload
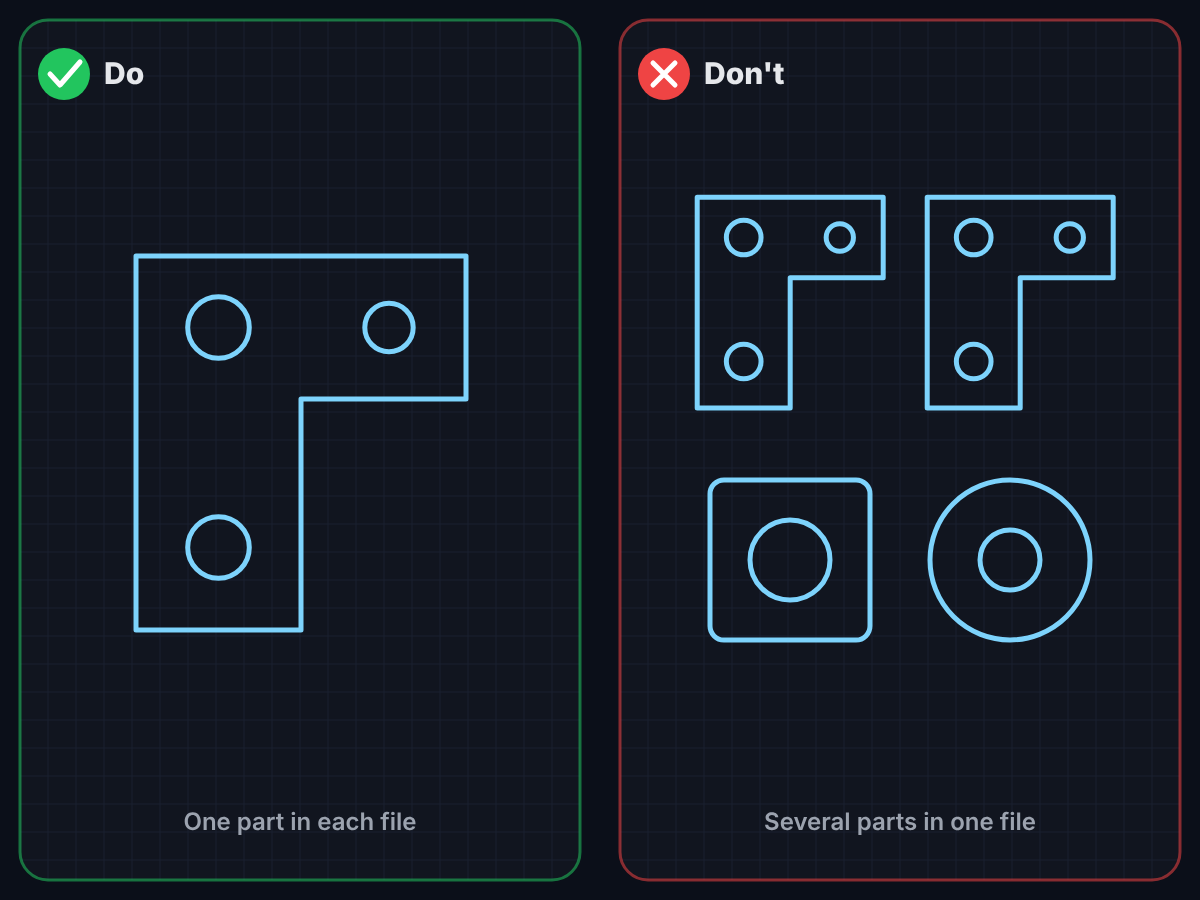
Put one part in each file
Each part gets its own material, thickness and quantity in the quote tool, so each one needs its own file. You can upload all of your files together in one go.
- Save each part as its own DXF, DWG or SVG file
- Give your files clear names, like bracket-left.dxf
- Need 20 of a part? Upload it once and set the quantity to 20
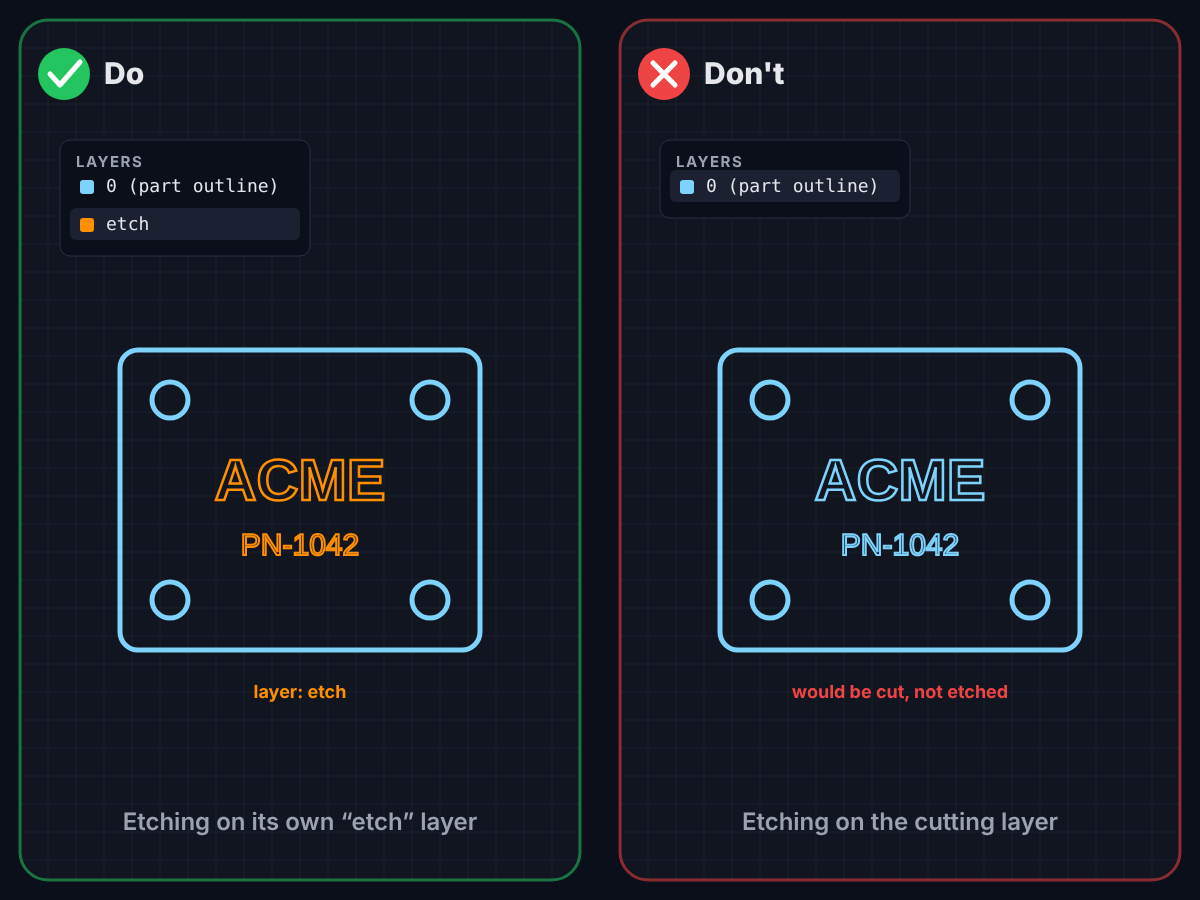
Put etching on a layer called “etch”
Etching marks the surface of your part without cutting through it. It’s ideal for logos, part numbers and labels. We find it by its layer name, so anything on your normal layer is cut, not etched.
- Create a new layer in your drawing and name it etch
- Put your text, logos and markings on the etch layer
- Keep all etching inside the part outline
- Saving as SVG? Put the etching in a group named etch
- Check the part preview shows your etching before you calculate the price
Perfect parts start with a clean file.
Run through this list before you upload. A couple of minutes tidying your file saves time and gets you an accurate price.
DXF, DWG & SVG drawings
For flat, laser-cut parts.
- One part per file, drawn at full size (1:1) in millimetres
- Each part needs one closed outline, with every line meeting the next
- Remove double lines, overlapping lines and duplicate holes
- Remove dimensions, text, borders and title blocks
- Remove bend lines for flat parts
- Keep the part on a layer that is switched on (hidden or frozen layers are ignored)
- Anything to be etched goes on its own layer called etch
STEP models
For parts that need folding.
- Folded parts must be .step or .stp files (DXF, DWG and SVG can’t be folded)
- One part per STEP file
- Model it as sheet metal at the thickness you’re ordering
- Remove screws and PEM hardware, these can be added on the quote page.
- Check the 3D view and confirm the folded shape before ordering
- Complex folded parts may need a manual quote, just ask
From drawing to order in six steps.
Once your file is ready, getting a price and placing your order takes a few minutes.
Upload your files
Drag your DXF, DWG or SVG files into the upload area, or click it to choose them. You can add several parts to one quote.
- Upload one part per file
- Each part gets its own card with a preview
- Parts that need folding must be uploaded as a STEP model (.step or .stp), not a DXF
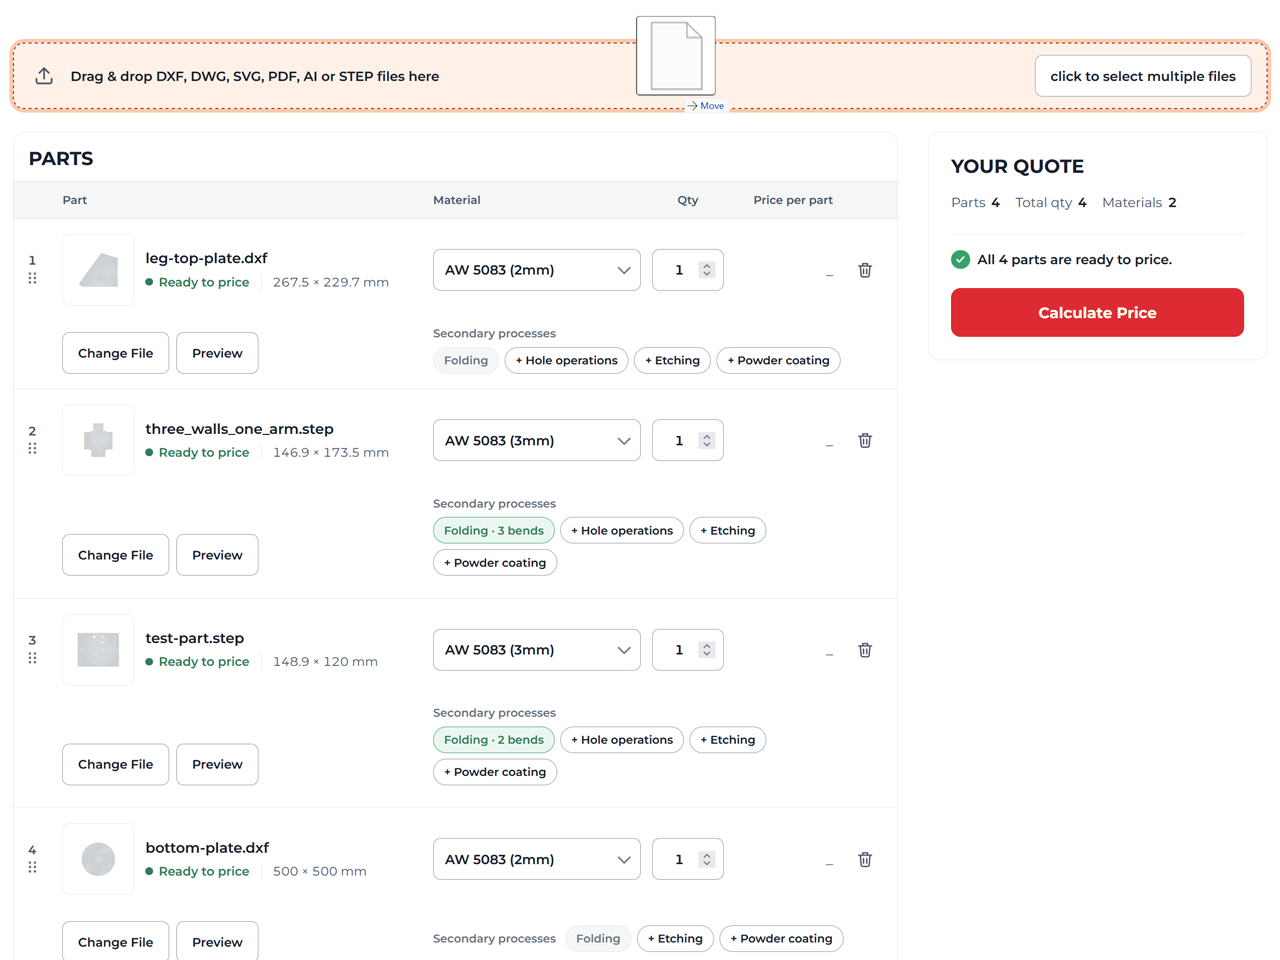
Choose material & quantity
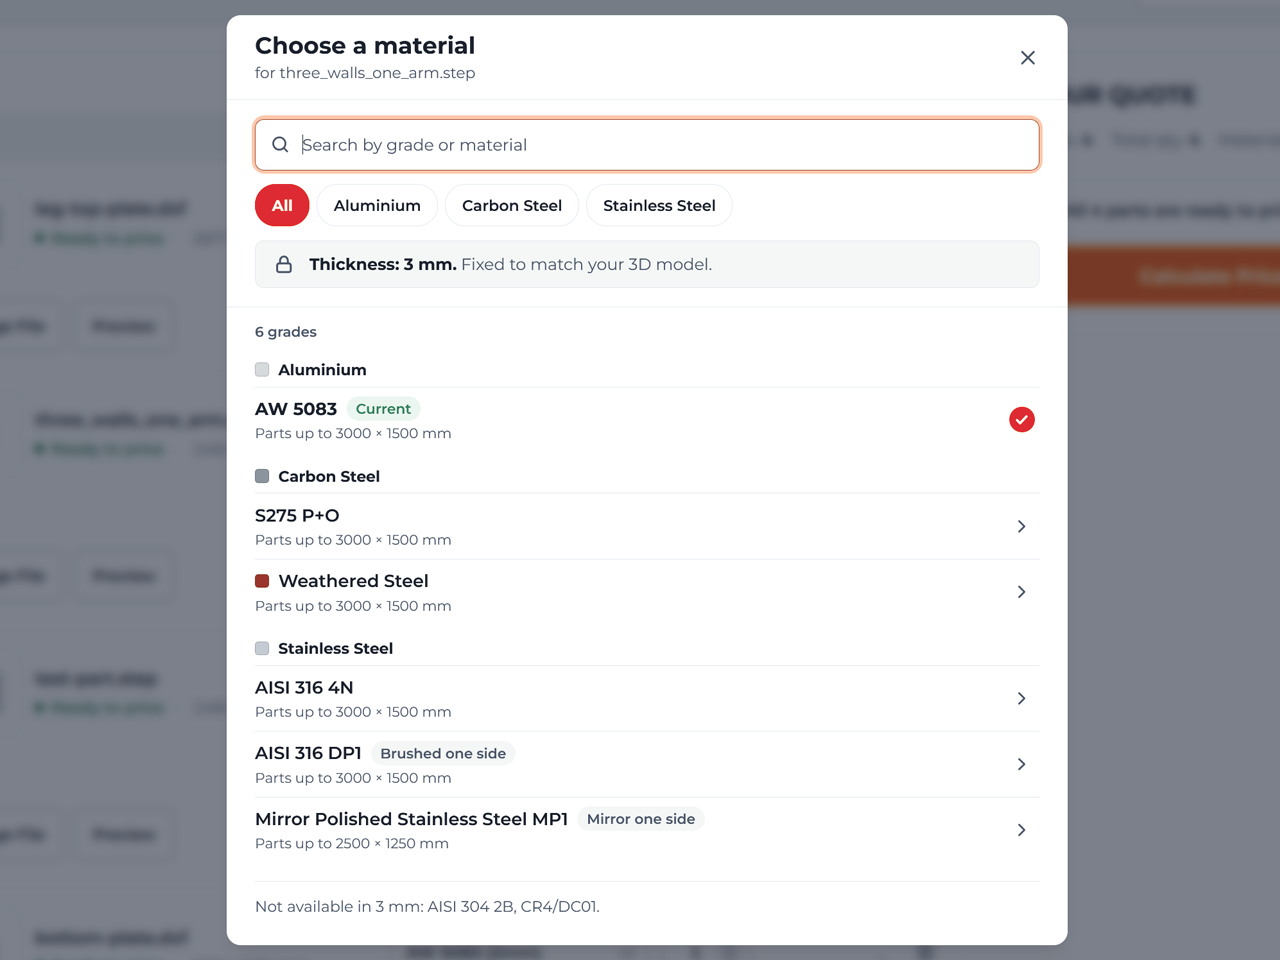
Pick your material and thickness. You can search by material or grade. Then enter how many of each part you need.
- Every material, grade and thickness we stock is listed
- For brushed or patterned finishes, choose the finished face and which way the grain runs
- Set a quantity for each part
Check the size
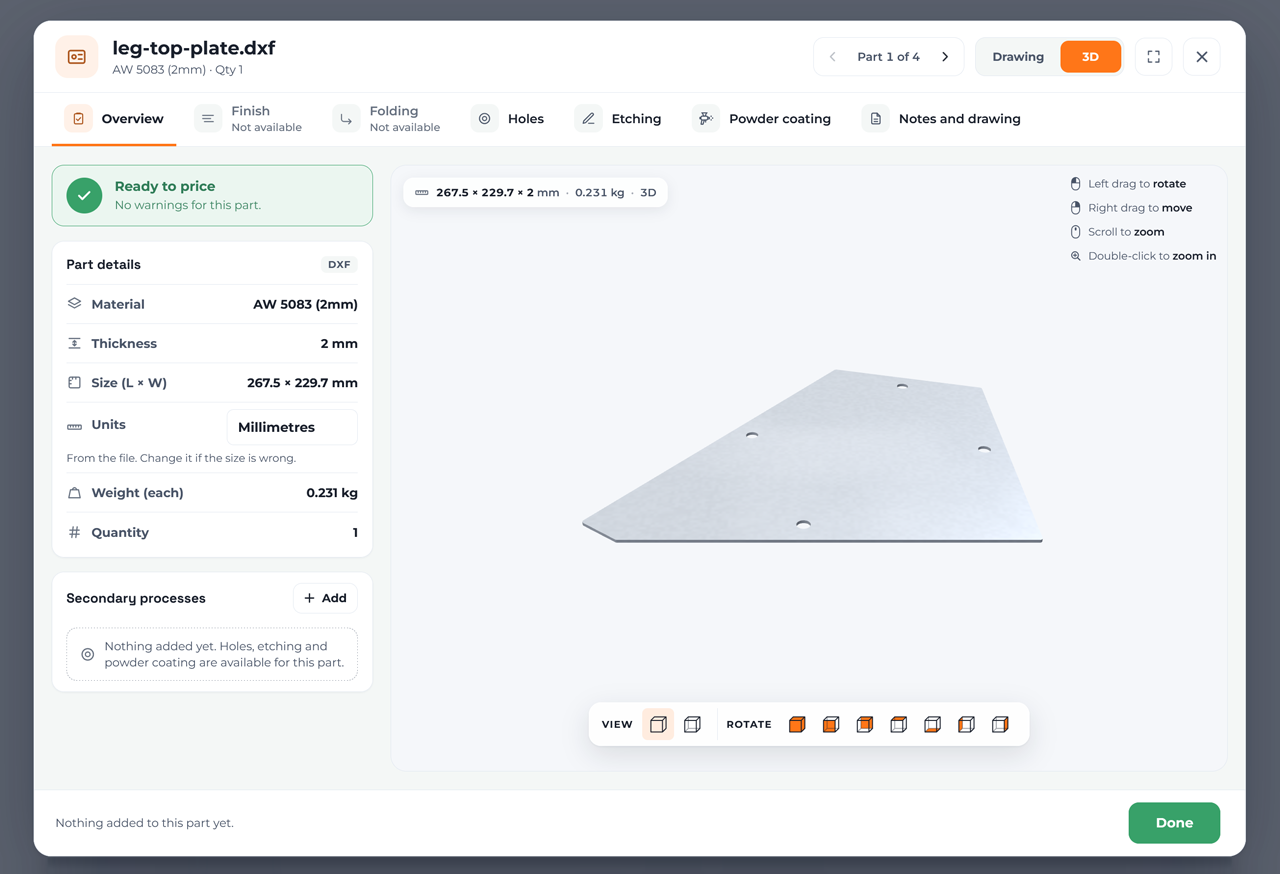
We read the size of each part from your drawing and show it on the part card. Check it matches your design, then press Confirm dimensions. This catches drawings saved in the wrong units.
- Sizes are shown in millimetres
- If a size looks wrong, check the units your file was saved in
- Open the part preview to see exactly what will be cut
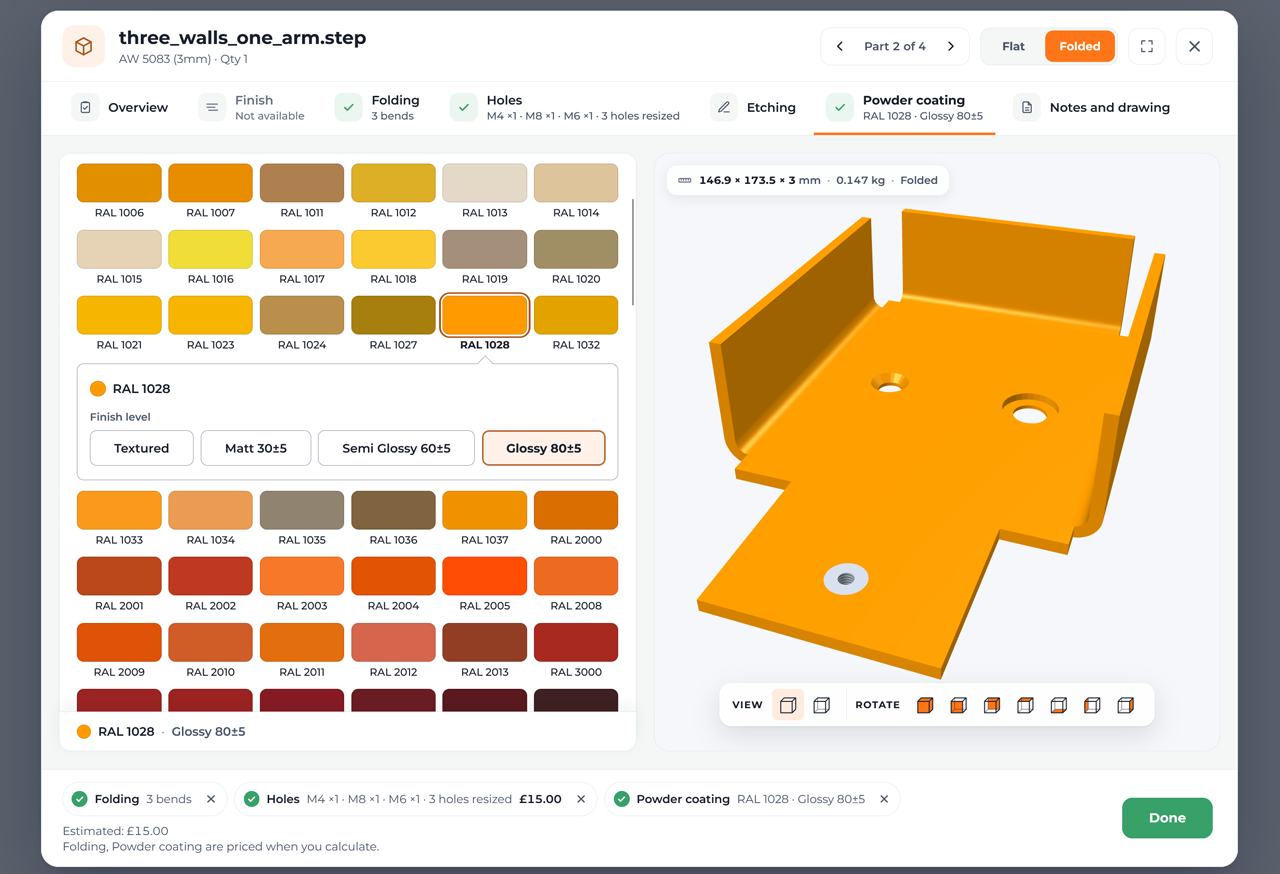
Add folding & finishing
Open a part to add the extras you need. Every option is priced automatically, so you’ll see the cost straight away.
- Folding: upload a STEP model (.step or .stp only), then check the 3D view and confirm the folded shape
- Powder coating: choose a colour and finish, then confirm where the hanging holes go
- Holes: countersinks, counterbores, tapped holes and rivnuts
- Etching: draw logos, part numbers or text on a separate layer called etch in your drawing (see below)
Calculate your price
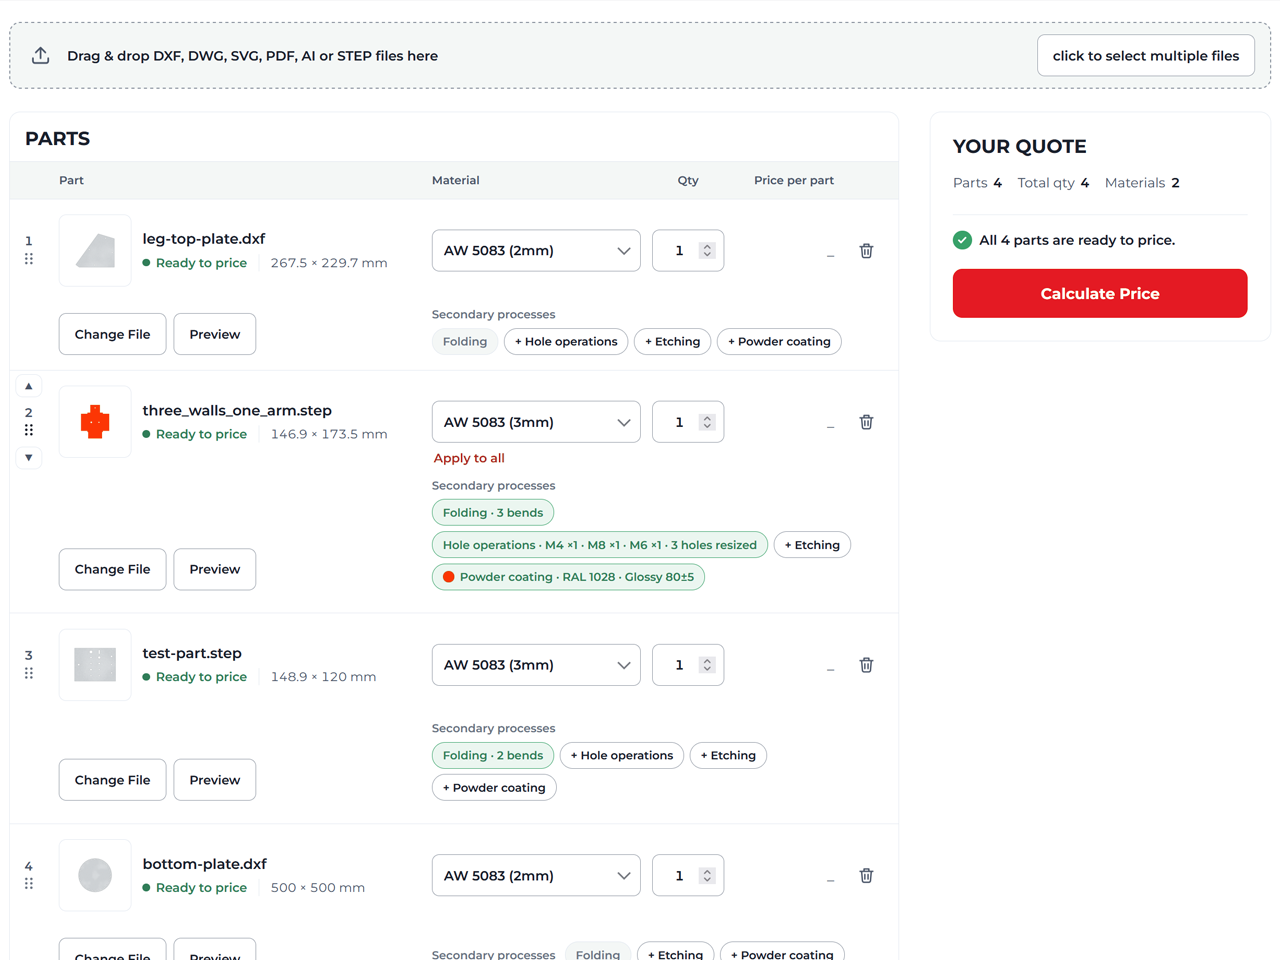
When all your parts are ready, press Calculate Price. Your parts are laid out on the sheet to use as little material as possible, and your price appears in seconds.
- See the price for each part and the total
- Open the Layout Preview to see how your parts sit on the sheet
- Please check the previews carefully before ordering
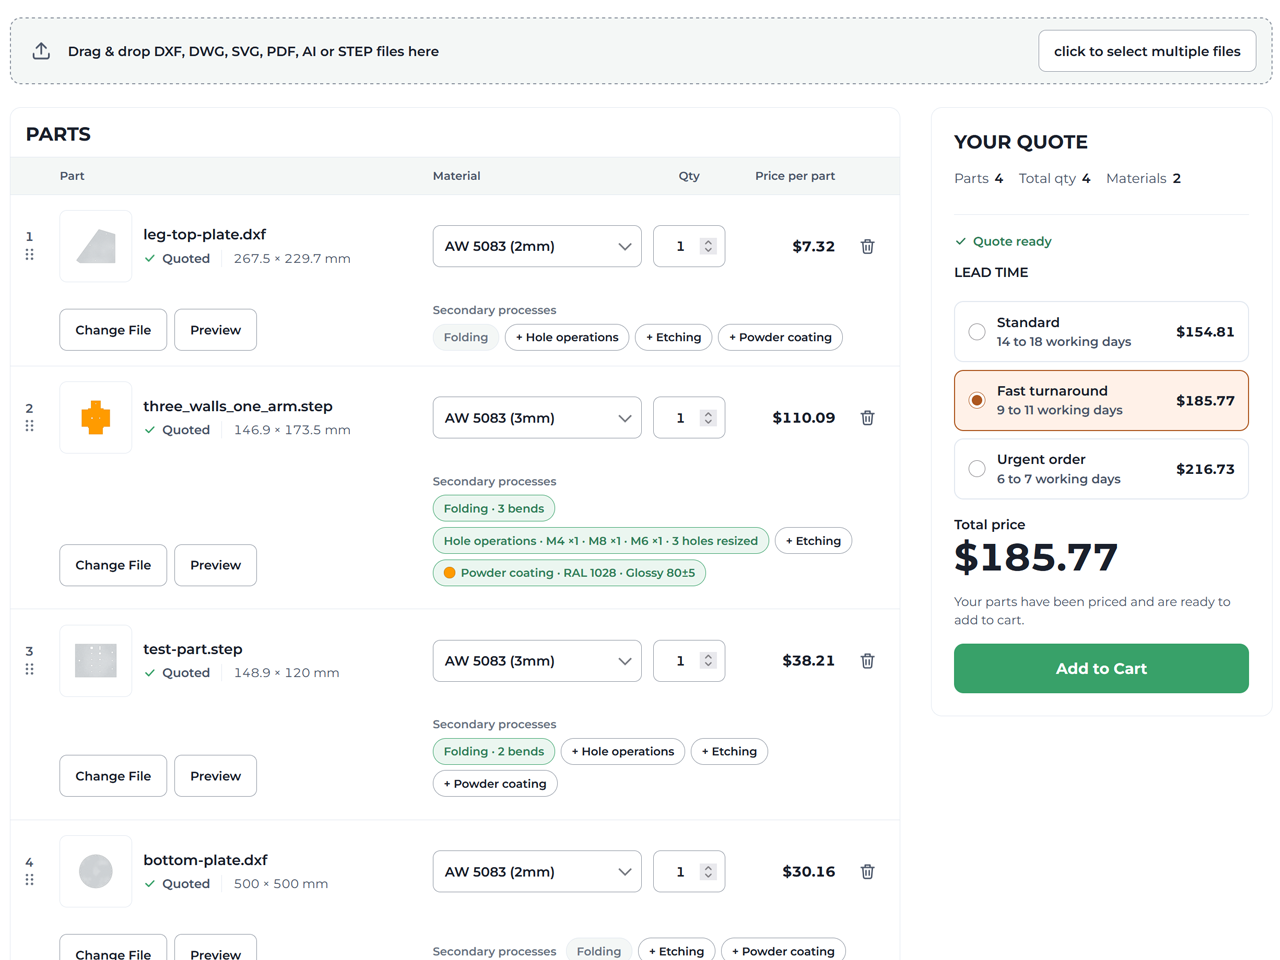
Order & checkout
Happy with your quote? Press Add to Cart, then check out securely. Choose your lead time and delivery, and we’ll get cutting.
- Pick a faster lead time if you need parts sooner
- Courier, pallet or freight delivery, depending on size and weight
- Track your order and reorder from your account
Common messages, and how to fix them.
If the quote tool flags a problem with your file, here’s what it means.
Still stuck? Email info@cutmyparts.ca or call 1-833-634-6474 and we’ll help you get your file ready.
Folded parts can only be uploaded as STEP models. In your CAD software, export the part as STEP (.step or .stp) and upload that instead. DXF, DWG and SVG drawings are for flat parts only.
The outside edge of your part has a gap, so it isn’t one continuous shape. Zoom in on the corners in your CAD software, join any lines that don’t quite meet, then upload the file again.
Your drawing probably has lines drawn on top of each other, or a shape that isn’t closed. Delete the duplicate lines (many CAD programs have an “overkill” or “remove duplicates” tool) and check every shape is closed.
Your file contains more than one part. Save each part as its own file and upload them together, each with its own quantity.
The shapes are on layers that are switched off, frozen or set not to print, so nothing would be cut. Turn the layers on, or move the part to a visible layer, then save and upload again.
Your file was probably saved in different units, for example inches instead of millimetres. Re-save it in millimetres at full size (1:1), then upload it again.
The part is bigger than the sheets we stock in that material and thickness. Try another thickness or material, or contact us about a manual quote.
Very large jobs are over the limit for online ordering. Get in touch and we’ll quote it for you.
Etching is only picked up from a layer called “etch” (for SVG files, a group named “etch”). If your text or logo is on the same layer as the part outline, it’s treated as something to cut. Move it to an etch layer, save, and upload the file again.
Part of your etch layer is outside the part outline. Move or shrink it so it sits fully on the part, then calculate your price again.
Parts that are powder coated need hanging holes. Open the part, check where the suggested holes are, move them if needed and confirm, then calculate your price again.
Ready to get your parts cut?
Upload your file for an instant quote, or call us for advice on materials and finishes.